
Locust Pose (Salabhasana)
What is Locust Pose?
Locust Pose, also known as Salabhasana, is a yoga pose that prepares you for backbends and opens up your chest muscles and vital chakras. Additionally, with consistent practice, this posture can strengthen your core, enabling you to do deeper backbends.
Locust stance belongs to the family of backbend poses. Deep tissues in your gut, tailbone, and spine are activated by this position. Thus, with regular practice of this pose, you may strengthen your legs, spine, and lower back.
One yoga pose that bends the back is Shalabhasana. Beginner yogis can enhance their back-bending practice with the help of this ‘baby backbend’. Physically, you might experience alleviation from the muscles causing your back pain after doing this pose.
Shalabhasana’s back-bend movement differs from other backbends:
- Shalabhasana is the only backbend in which we enter the position by using our back extensors; the opposite action does not prohibit this.
- In other backbends, we push against our arms and legs to deepen the stance. Here, however, we defy gravity in the same way.
Shalabhasana is primarily performed to increase flexibility and to activate and strengthen the back extensor muscles.
Muscle Work During Locust Pose:
- Arm and Shoulder Muscles
- Neck Muscles
- Chest Muscles
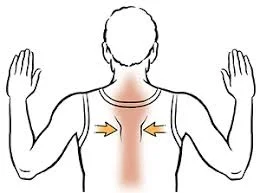
- Middle and Lower Back Muscles
- Core Muscles
- Pelvic Muscles
How to Perform?
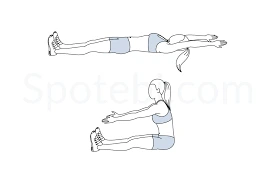
- Lay prone on your mat to start. Your palms are touching the floor along the side of your torso, and your forehead is lying on the ground.
- Now, as you exhale, raise your head, chest, and leg off the ground at the same time. Raise your limbs to the maximum extent possible.
- Remind yourself not to put your ribs on the ground. The only parts that stay on the floor or support the weight are the front abdomen and front pelvis.
- Stretch your thigh muscles and contract your buttocks. Touch your ankles, thighs, and knees while both legs are completely extended.
- Keep your chin parallel to the floor and fix your eyes forward or slightly upward. Verify whether there is any compression on the back of your neck.
- Purna Shalabhasana, the Shalabhasana, is thus finished. At the last step, your torso and legs will be concave due to the stretching and elevation.
Benefits:
- This pose improves the strength, power, and endurance of the erector spinae, upper back, lower back, and back extensor muscles. One study found that women who regularly do back extension.
- When it comes to stomach issues like indigestion and flatulence, Shalabhasana offers relief. It improves and restores the digestive organs’ ability to work by exerting pressure on them.
- By increasing the spine’s flexibility, stretching in this pose helps to relieve discomfort in the sacral and lumbar regions. Research indicates that the practice of Shalabhasana and other yoga therapies significantly affects the levels of serotonin and brain-derived neurotrophic factor (BDNF) in the blood. These nociceptive pathway neuromodulators might be responsible for yoga’s positive impact on persistent low back pain.
- Shalabhasana’s application of pressure to the belly benefited the female uterus, bladder, and prostate, among other internal organs.
- By raising the legs in this pose, blood is drawn to the pelvis, improving the nutrition of reproductive cells. As a result, consistent practice increases sexual stamina and restores sexual potency.
- Following a period of holding in Shalabhasana, the muscles actively participate in the practice. Consequently, the muscles that return relax. This reduces tension and anxiety by calming and creating a sense of calm.
- Compared to a vertical position where gravity imposes resistance, a horizontal position allows for optimal circulation. As a result, practicing this pose guarantees improved blood flow throughout the body.
Beginner’s Advice:
- It may be difficult for beginners to lift both legs in the air. An alternative to this would be to raise each leg separately (left and right) for a certain amount of time.
- Another difficulty for the novice to overcome is the dissociation of the chest. To do this, place your hands along your waist or just behind your shoulder, then press to raise yourself.
Preparatory Pose:
Sun Salutation, or Surya Namaskar:
The Surya Namaskar flow will stimulate blood circulation in the legs, spine, and upper body if you are exercising first thing in the morning.
Spend at least 10 to 12 rounds of sun salutations to allow your muscles to relax. Your joints, ligaments, and muscles will be protected from any unintended harm in this way.
Cobra Pose, also known as Bhujangasana:
Cobra posture might assist in releasing tension if you have lower back pain. Spread your legs out behind you and place your tummy on the floor. Ensure that your glutes and core are tight.
As you raise your upper body off the mat, bring your arms to your chest and take a deep breath. Hold this backbend stretch for a few seconds while keeping your arms slightly bent, and then slowly release the pose.
Urdhva Mukha Svanasana, or the Upward Dog Face:
Because your body is not resting on the floor, your muscles will flex even more in this pose, which is quite similar to the cobra pose.
The upward-facing dog position and the cobra pose are identical except that you maintain your body weight on your palms and toes while lifting your knees off the mat. For a few seconds, maintain this position.
Modifications:
- When balancing the body over the chin, there is a possibility of injury. The solution can be to replace the forehead or place a blanket under the chin.
- A folded blanket can be placed beneath the chest if pressure is felt there. This will help keep the posture without interfering with breathing.
- Beginners might assist themselves in lifting the former by placing their hands beneath their thighs. Avoid placing weight on the wrist, though, since this could result in harm.
Variations:
Salabhasana with Resting Legs:
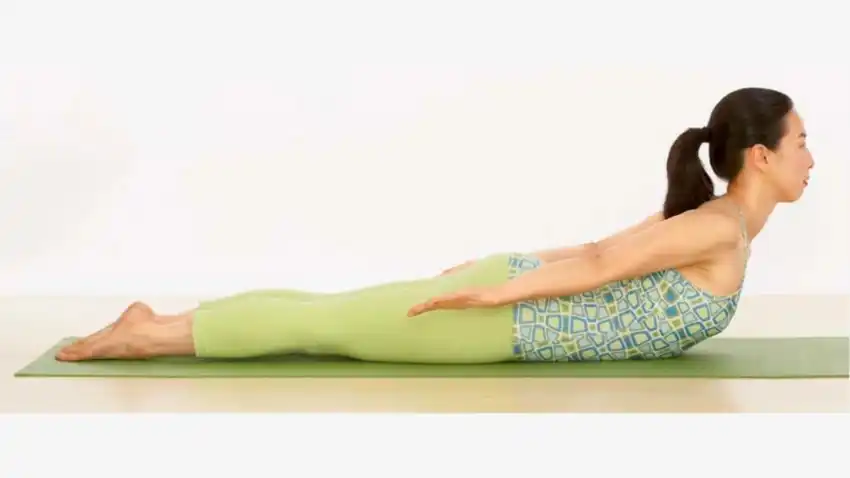
Try doing the Locust pose to develop posture awareness in your body first if you have trouble raising either leg.
Simply use your spine to raise your upper body while maintaining a backward flexed position for both arms. Keep your legs flat on the floor and focus on using your lower body.
Salabhasana with Elbows Bent:

Try putting your palms near your chest to strengthen your core so you can raise both legs.
Raise your upper body by pushing against the floor with your palms, and then raise both of your legs. In this form of Salabhasana, you can restrict the range of motion of your tail bones if you are unable to raise your legs higher.
Locust Pose Bound Hands:

Try the bound arms form of the Locust pose if you’re an experienced practitioner looking to push yourself.
In this position, your arms are bound and hoisted in the air, and your legs are flexed back in the air. This pose helps to expand your chest muscles and engage your lower back.
Ardha Shalabhasana:

An efficient method before moving on to Purna Shalabhasana is Ardha Shalabhasana.
This allows practitioners to simultaneously raise one leg and the opposing arm. For instance, lift the right arm and left leg off the ground while using the matching limbs. Then, with the other two limbs on the floor, the right leg and left arm should be elevated.
Makarasana:
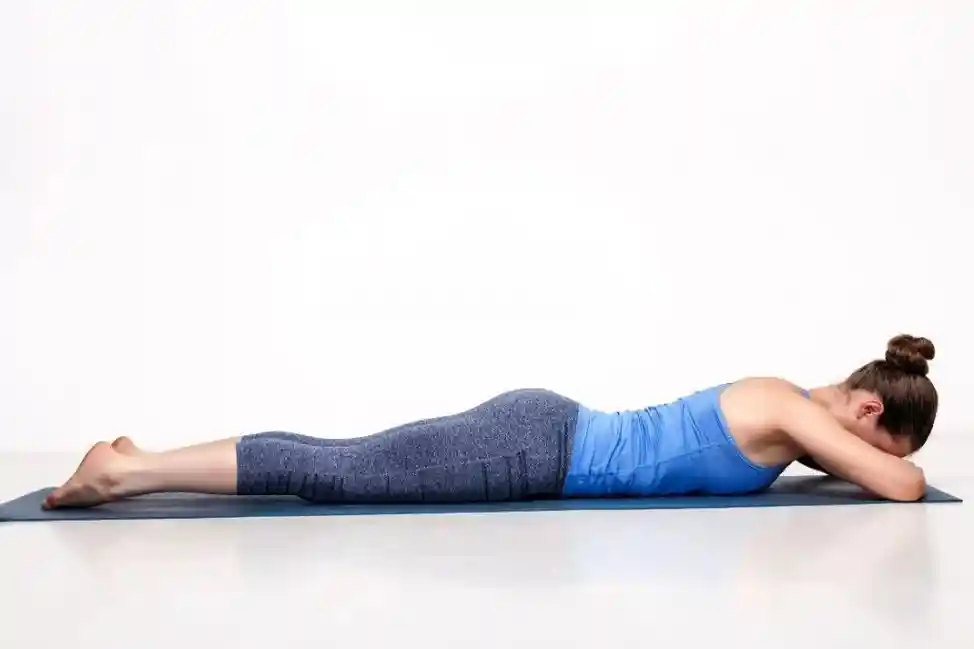
One form of Shalabhasana is Makarasana, which is the crocodile position.
One can raise their head from a prone position in Shalabhasana, keeping their elbows on the floor and their palms beneath their jaws. Toes pointing outward and legs stretched apart from one another. Give your body a sense of stability.
Contraindications:
- Women who are menstruating or pregnant should not perform Shalabhasana.
- This pose is avoided by those who have spine injuries. After the discomfort subsides, practitioners with lower back pain can resume light practice; however, injuries to the affected area should be avoided.
- Patients with high blood pressure should refrain from holding Shalabhasana for extended periods of time and holding their breath.
- It is not recommended for people who have had surgery within the last few months, have a potbelly, or have a hernia to perform shalabhasana.
FAQs
What are the benefits of Salabhasana?
Salabhasana offers several health benefits, including the following:
Enhances digestion.
Reduce lower back discomfort.
Aids in getting ready for more complex backbends.
The autonomic nerve system is stimulated.
Enhances your posture when sitting and standing.
It aids in burning fat in the legs and abdomen.
Activates several Chakras, which promotes therapeutic healing.
Strengthens and stretches the legs, back, abs, glutes, neck, spine, and navel.
What is Ardha Salabhasana?
A simple variation of Locust Pose, known as “Half-Locust Pose” in English from Sanskrit, is Ardha Salabhasana.
Only one leg is elevated at a time in this stance rather than both legs being raised against gravity. In addition to making it simpler for novices to become more stable in the position, this will help you gradually increase your strength for the entire Locust position practice.
Can beginners perform Viparita Salabhasana?
If a beginner is just beginning yoga, they should refrain from doing Viparita Salabhasana. It’s best to start with easy backbends like Camel Pose, Up-Dog, and Cobra Pose to establish your foundation.
You can begin with the Half-Locust Pose and progress to the full Locust Pose once your lower body and core are sufficiently strong. You can gradually graduate to more difficult forms of Salabhasana after you have perfected the Locust stance.
What is the meaning of Salabhasana?
Two Sanskrit terms, “Salabh,” which means locust or grasshopper, and “Asana,” which denotes posture or stance, are combined to form Salabhasana. Salabhasana literally translates as “locust pose” or “grasshopper pose.”
How do you cue Salabhasana?
Position yourself on your yoga mat on your stomach.
Place your hands under your thighs.
Rest your head on your chin and focus on breathing slowly for a few seconds.
Inhale deeply and engage your entire core and shoulders.
Raise your legs behind you and hold the pose.
Continue holding for 5 to 30 seconds.
Finally, exhale and slowly release the pose by placing your legs back on the ground.
How long should you hold the Locust Pose?
You should aim to maintain the locust stance for five to ten seconds as a beginner. A more experienced yogi can maintain a position for 30 to 60 seconds or longer.
What is the locust pose good for?
Enhances the strength of the posterior chain, which includes the calves, glutes, hamstrings, rhomboids, trapezius, lats, and erector spinae. stretches the front of the shoulders and the chest. enhances posture. can aid in the relief of lower and upper back discomfort.
References:
- Allen, W. (2025f, August 26). Salabhasana. https://myyogateacher.com/yoga-asana/salabhasana
- Shalabhasana (Locust Pose): Meaning, Steps, Benefits, & Precautions – Fitsri Yoga. https://www.fitsri.com/poses/shalabhasana
- Locust Pose Yoga Pose (Salabhasana). Tummee. https://www.tummee.com/yoga-poses/Salabhasana